Since we have been using Dynamics CRM, it has always had Territories. However, the Territory feature has been very limited. It only provides a way to name a Territory but there was no other business logic around that which could help with true Territory Management features that organizations desire.
With Maplytics™ our flagship solution for Dynamics 365 (Dynamics CRM) that provides data visualizations on Bing Maps we have tried to bridge this gap. It has been our aim to extend the existing Territory feature native to the product and build upon it.
Through Maplytics you can now define the geographic regions that are being covered under a territory. You can define the geographies either by providing a list of zip codes that the territory covers or it might just be a city or a state that you categorize a territory as. If you have a bespoke region and would prefer to just draw that on the map to define it, we have a tool to help you do just that!
Defining Territories
Let us walk through the steps to define a geography for a territory using Maplytics territory management feature.
- Navigate to Settings → Business Management → Sales Territories to add a new Territory
- Fill in the necessary information:
- Territory Name: Name your territory.
- Manager: Territory Manager.
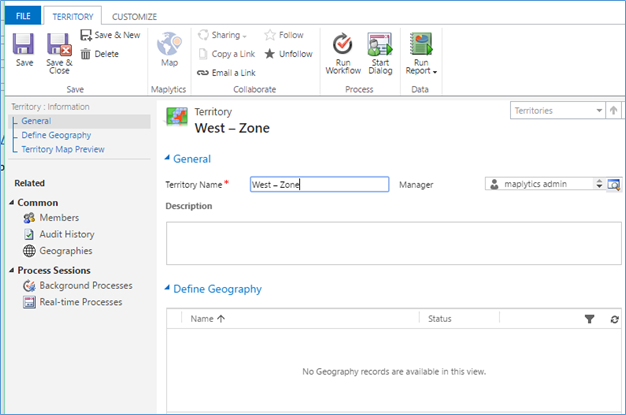
- Once the territory has been saved. You will now find the option to define the geographies for the territory. In this example, we are going to add 10302, 10310, 10314 postal code to ‘West – Zone’ territory.
- Click on Geography option from the left side panel and ‘Add New Geography’. The user can add multiple regions to a particular territory.
Fill in the Name of Geography and then in the Map that’s shown in the section below enter the postal codes that this territory would cover and click Plot Region to see the region defined on the map as shown in the below screenshot;
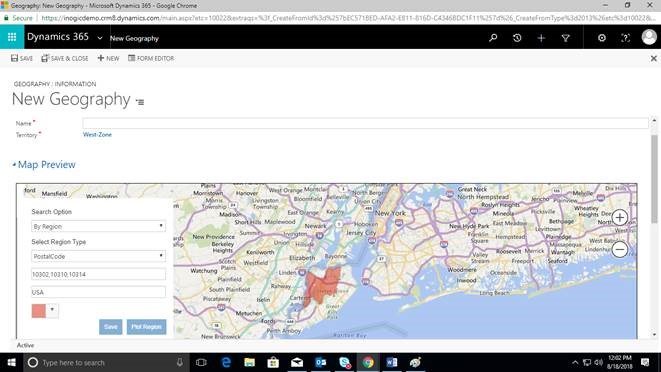
Note: In the second field, the user can also enter the City, State, Country to accurately plot the geographies.
- Alternatively, you can also use the Drawing tools provided to draw the region on the map as seen in the screenshot below;

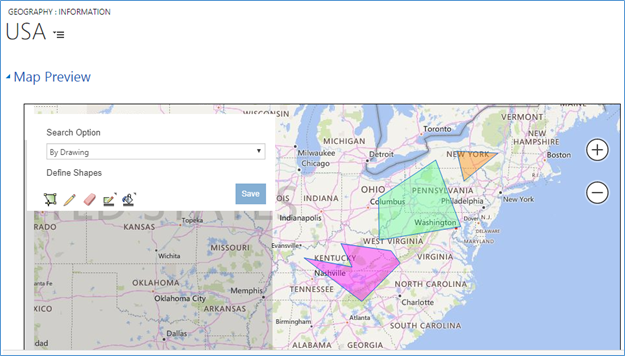
- Once you are satisfied with the region covered in the map you can click on save to associate this region boundaries with the territory.
Conclusion:
Once the region covered by the territories has been defined, it will be used for auto-assigning of account records to the appropriate territory based on the address provided on them. We will discuss more on this in the next blog to follow. Stay tuned!


