Maplytics helps users to plot data from Dynamics CRM based on desired search criteria and save it as a template. This saves a lot of time for the user and makes it more efficient to use. Now, what if the user needs to execute the same search around the same record frequently? With the latest release, we have provided a way to add a Maplytics Detail Map component that loads the saved template associated with the Dynamics CRM entity record on the Entity Form.
This gives the users a jump starts on the maps with the frequently used search criteria. This way the users can see the desired template in regards to the individual record and execute further actions on the same.
Let’s say Mr. David is a service provider and one of his customers is interested in his service. Every time the customer needs service he needs to do a radius search to see which service providers are available within the proximity of the service location. Now with this latest feature, a user can plot the individual customer record and execute a Concentric Proximity search and save it as a template to show on the entity form of that customer record. To do this the user needs to follow the steps mentioned below. For David’s instance, we have chosen the Accounts entity.
1. Create a lookup field on an Entity form
- Account record > Form > New field
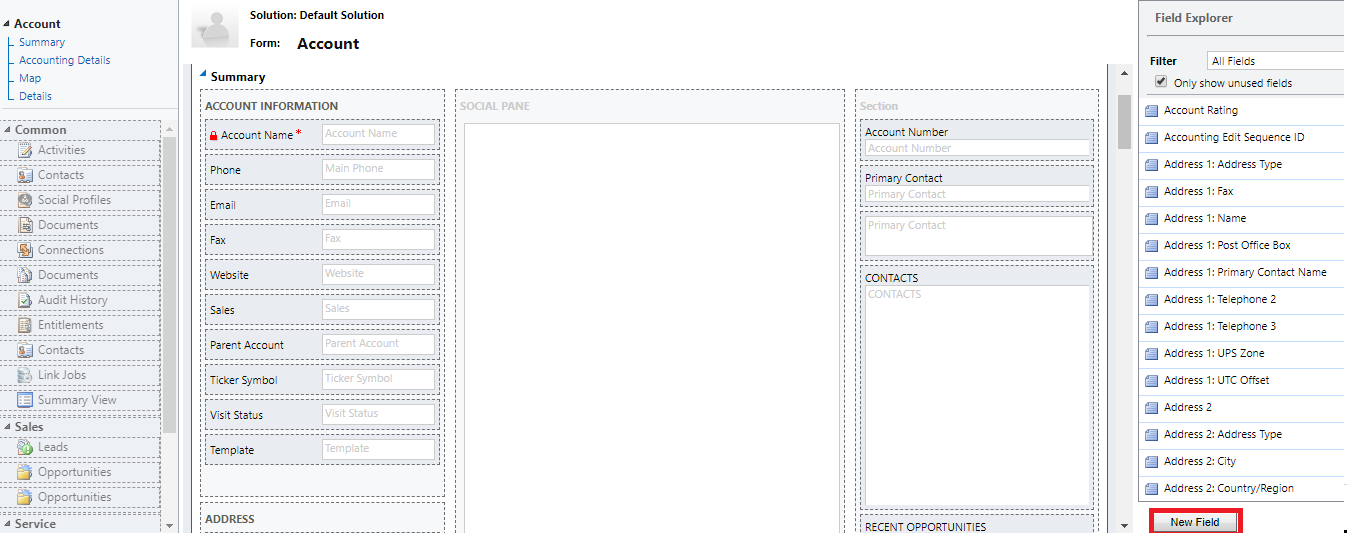
- Here we have name the field as ‘Template’ with the data type ‘Look up’
- Select the Target Record Type as ‘Maplytics Templates’
- Click on Save and Close
- Add this field on form > Save and Publish

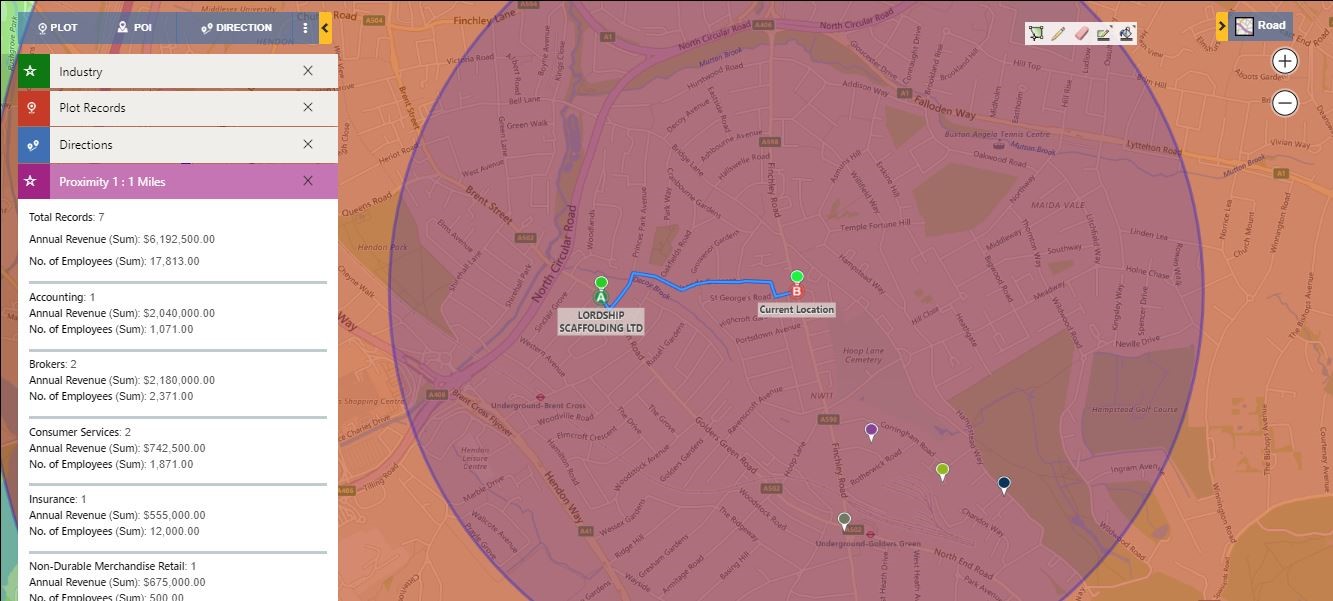
- Select a template and save. We have selected a template named ‘Concentric proximity’. The template Concentric proximity search shows all the active accounts within the proximity of 1, 2 and 4 radii of the record.

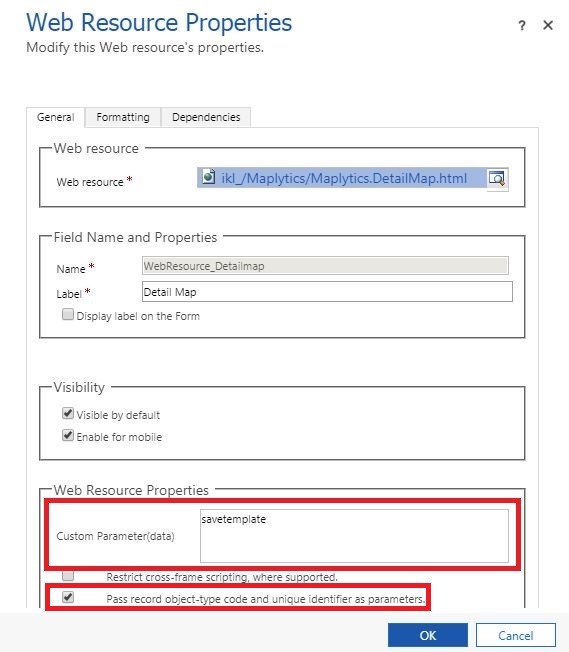
2. Add Detail map on Entity record form.
- Click here to know how to add a detail map on the entity form.
- Enter ‘savetemplate’ in Custom parameter (data) to make it identify the save template type map.
- Tick the checkbox for ‘Pass record object-type code and unique identifier as parameters’.
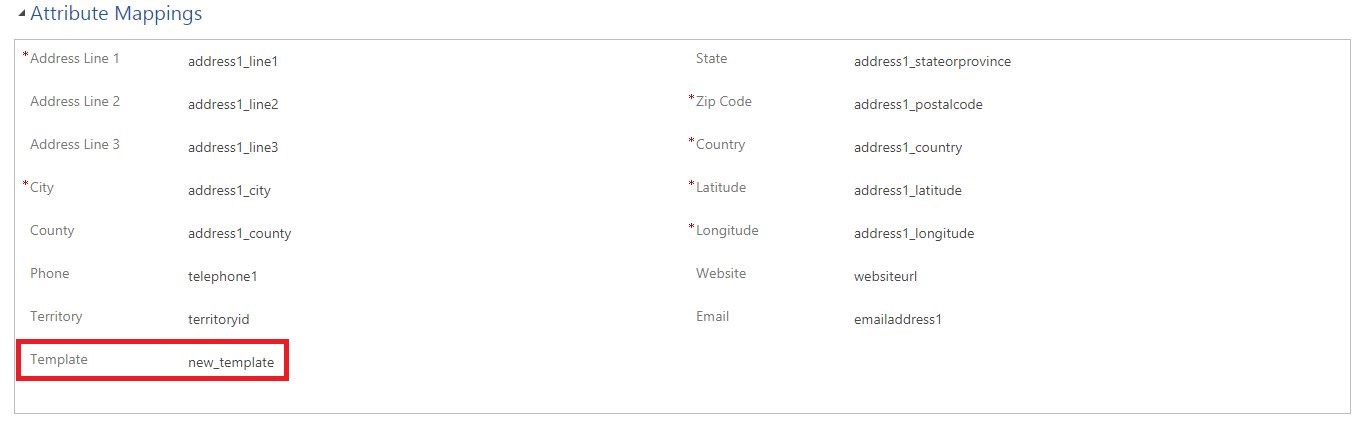
3. Enter the template name
- Enter logical name of the field ‘Template’ created on entity form in the entity map.
- Entity maps >Account > Attribute Mappings > Template
- The logical name of the field ‘Template’ created on the Entity form is new_template.
4. Refresh the Account entity form. The entity map will fetch the value from the logical name entered in the ‘Template’ field and plot the selected template ‘Concentric proximity’ on the form as shown below.

Now every time David will open this record, he will be able to see all the service locations nearby as saved in the template selected. Likewise, he can select different templates for different Entity records according to his preference. Now let’s say he realizes that one of the service providers is close enough to the service location to provide the service. Now David wants the concerned person to visit the service location and fix the problem. He can now plot an optimized route for the person.
This skips the steps of plotting the individual Dynamics CRM record of the service location and executing a Concentric Proximity search again and again. David can directly select a service provider and plot a route to reach the service location. Click here to know how David can send an email to the concerned person to follow the route. This saves a lot of time and provides a better user experience.
Click here to download the Maplytics solution as per your Dynamics CRM version.
Happy mapping!


