A Microsoft Dynamics 365 CRM user often deals with global data sitting in a small corner of his work country. Naturally, to be more precise in his decision-making, he needs the help of other supporting files containing more in-depth data regarding these different regions. This technical requirement gives rise to the feature of Overlay.
Maplytics, the 5-star rated app of the Microsoft AppSource enables Microsoft Dynamics 365 CRM users to envision CRM data on the map along with other supporting data from other sources.
Too technical? Let’s break it down-
You’re the Sales and Marketing Manager of a booming E-Commerce brand, eyeing new ground. Exciting stuff—but success starts with knowing your audience.
Who lives there? Young trendsetters, professionals, retirees, or Gen Z? What’s their spending power? Buying habits? These aren’t just stats—they’re your strategy.
Dig into demographics like age, income, shopping patterns, and sex ratio to craft campaigns that truly connect. The better you know them, the stronger your message—and your results.
Layering this demographic data onto location analytics gives you a sharp, visual edge. With overlay tools, you can see where your opportunities lie—helping you plan, pivot, and succeed with confidence.
Because when data meets strategy, growth isn’t just possible—it’s unstoppable.
Thanks to the overlay feature by Maplytics, the Manager can now…
- View the existing territories within the new area by plotting them over the Bing/Azure map and know the headcount in all the territories along with other details
- Import external shape/Excel files, save them in CRM, and plot the same over the map to view the territorial data in-depth
- Plot records using an external file without adding the records to the CRM, or
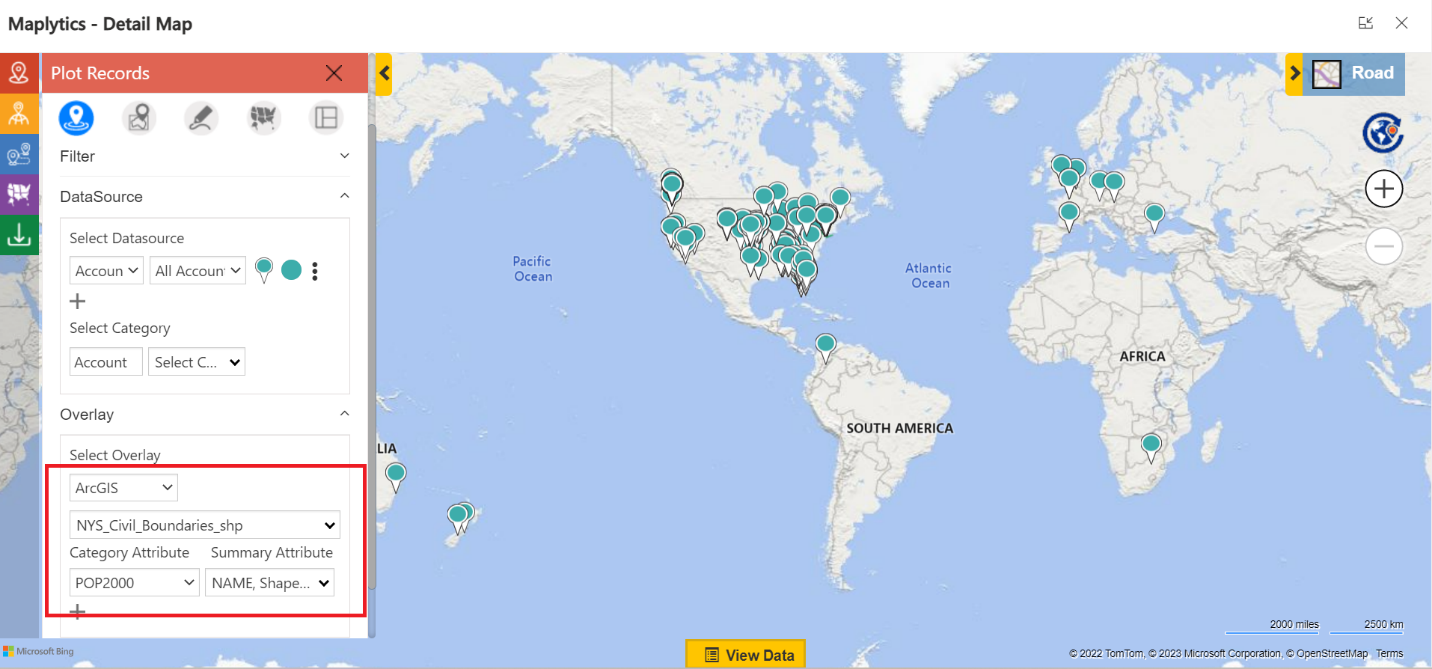
- Seamlessly integrate the ArcGIS Online feature layers with the Map and view the collated data of the new area
Viewing this organized data spread in the new sales area, he might decide on targeting 3 main territories with the right population age group, generation, and create marketing and selling plans for the young adults there.
The Overlay function of Maplytics helps a user to view the Dynamics CRM records along with shape/Excel files, existing territories, and ArcGIS Online feature layers plotted on the map. Using Overlay, users are easily able to understand and analyze the data spread in required shape file regions and territories.
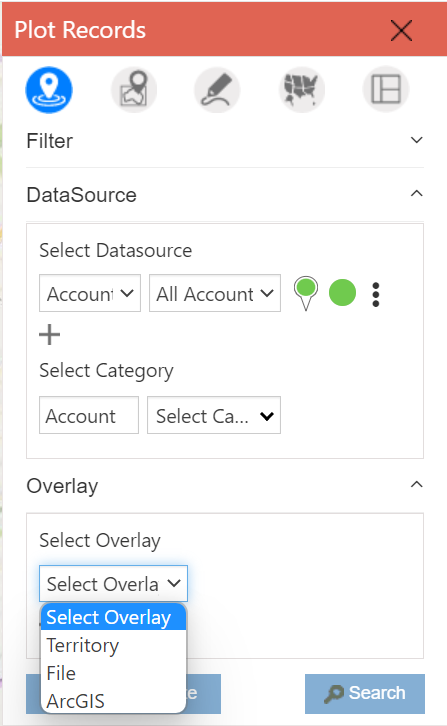
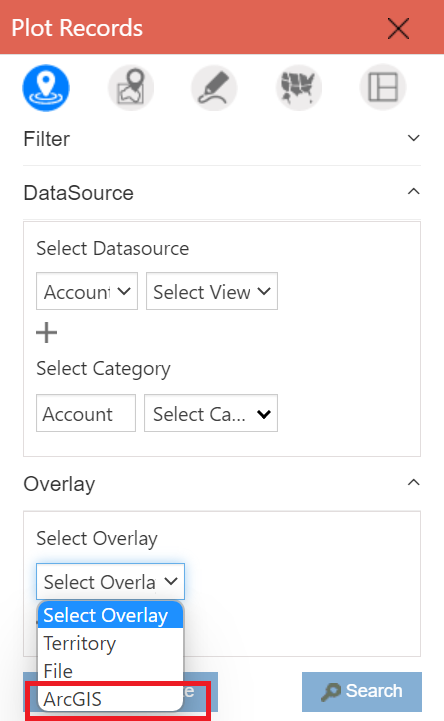
Users can select the following three options:
Territory – File – and ArcGIS
Overlay by ArcGIS Online
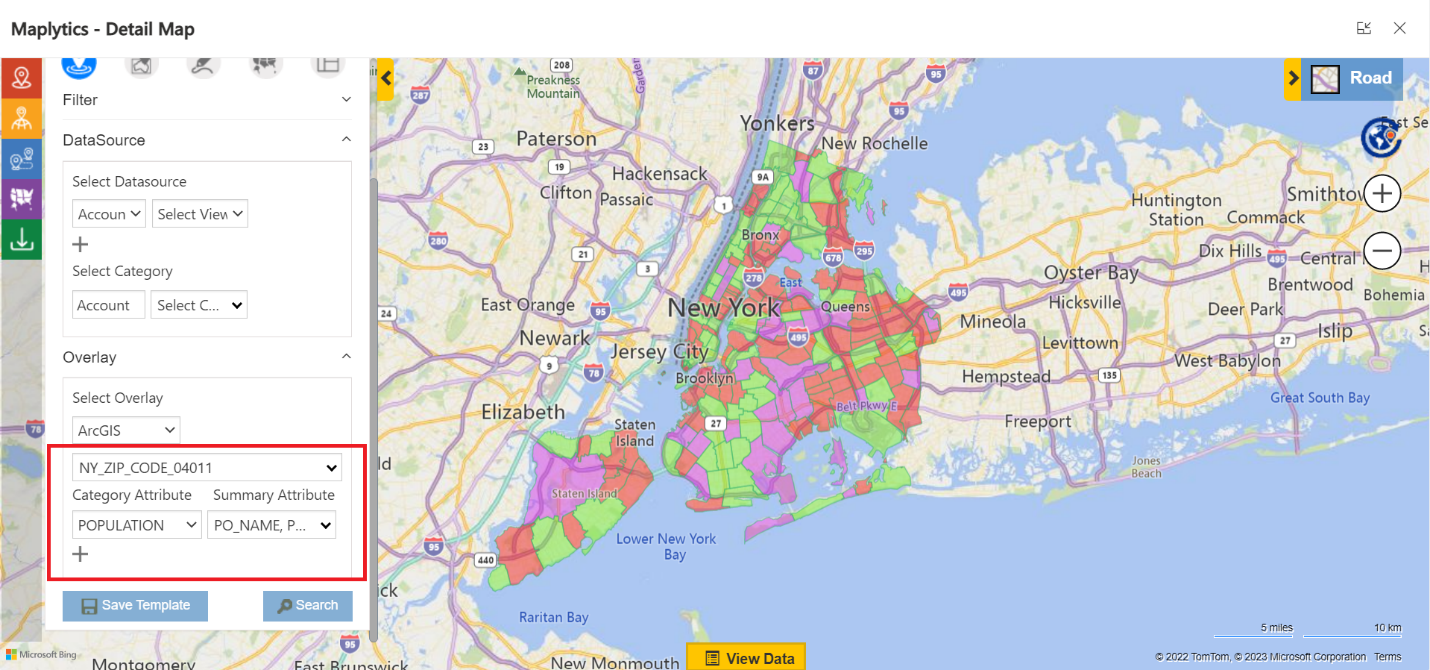
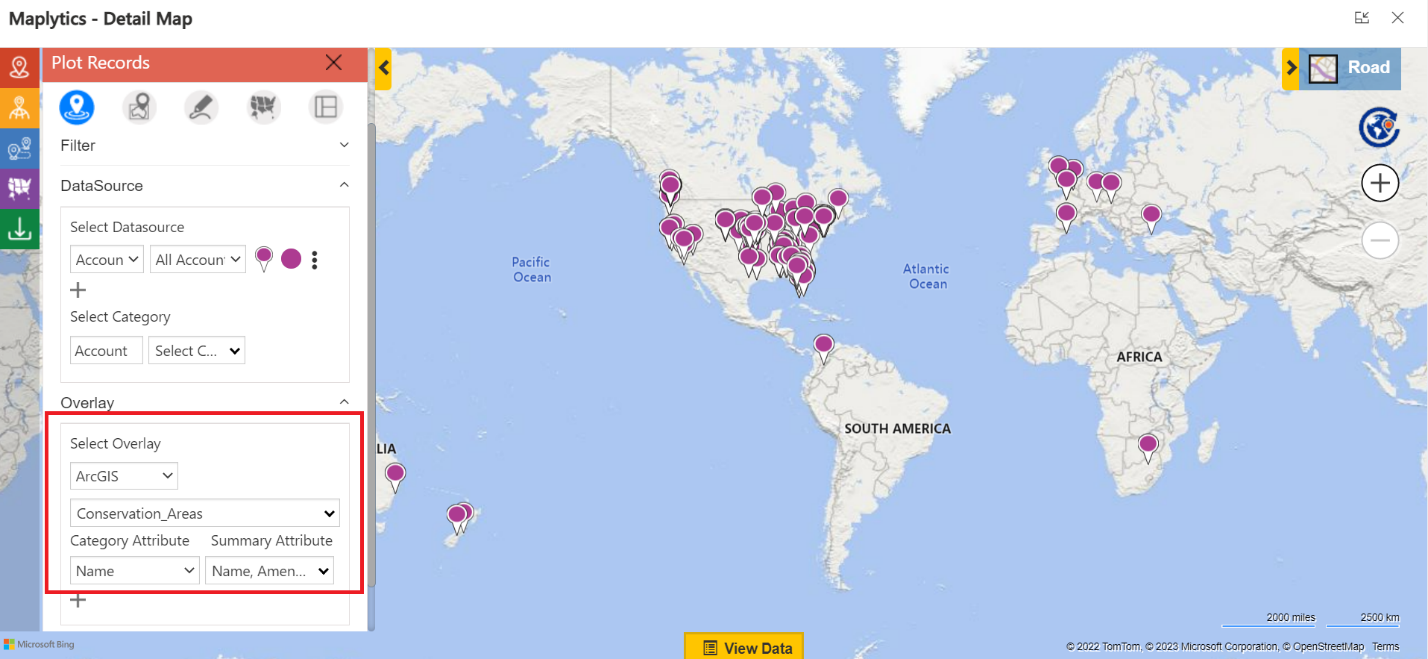
With a new collaboration with ESRI for Dynamics 365 CRM, Maplytics users can begin by establishing a seamless integration between Maplytics and ArcGIS Online with a few configuration steps. Once done, they can select from among the various feature layers available online on the ArcGIS portal and plot the same on the map.
Further users can select the following options as well.
Category Attribute: An attribute can be selected to categorize the regions plotted using the ArcGIS feature layer. The plotted regions are differentiated with multiple colors. This visual representation makes regional analysis easy.
Summary Attributes: One or more attributes can be selected to show the same in the Summary card. All attributes will be selected by default. Users can deselect them in the plot card and can select other attributes. Attributes selected in the summary attribute field will also be displayed when hovered over the region boundary.
Benefits of ArcGIS Online
- With ArcGIS Online, data, maps, apps, and other items can be easily shared with teams, departments, and/or the public.
- Data can be visualized spatially through web maps and apps that can be accessed from anywhere at any time.
- Data can be accessed in a web browser, ArcGIS Pro, smartphones, and tablets and even can be embedded into websites.
Integrate ArcGIS Online with Maplytics
For a seamless integration and to be able to utilize the hosted feature layers of ArcGIS Online, the user can perform a set of immaculate steps.
Single-factor authentication
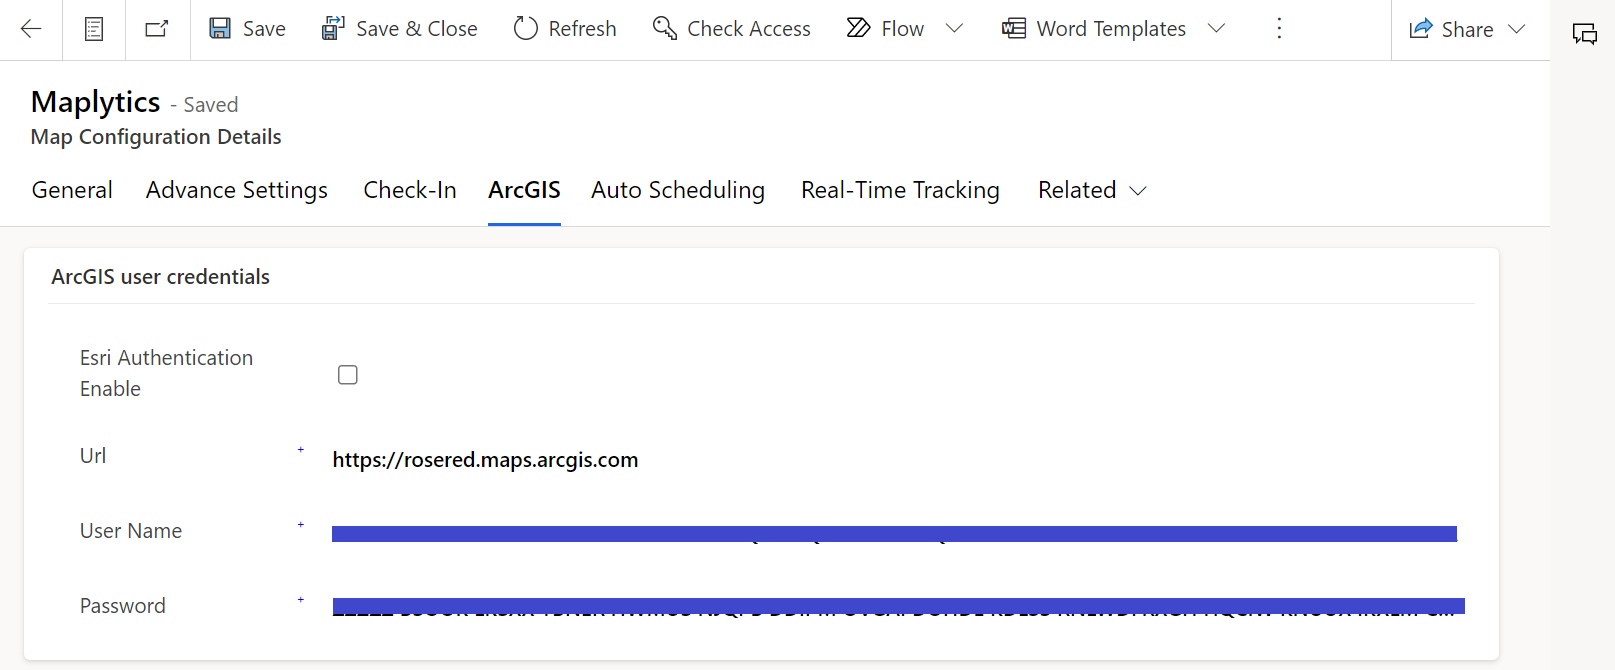
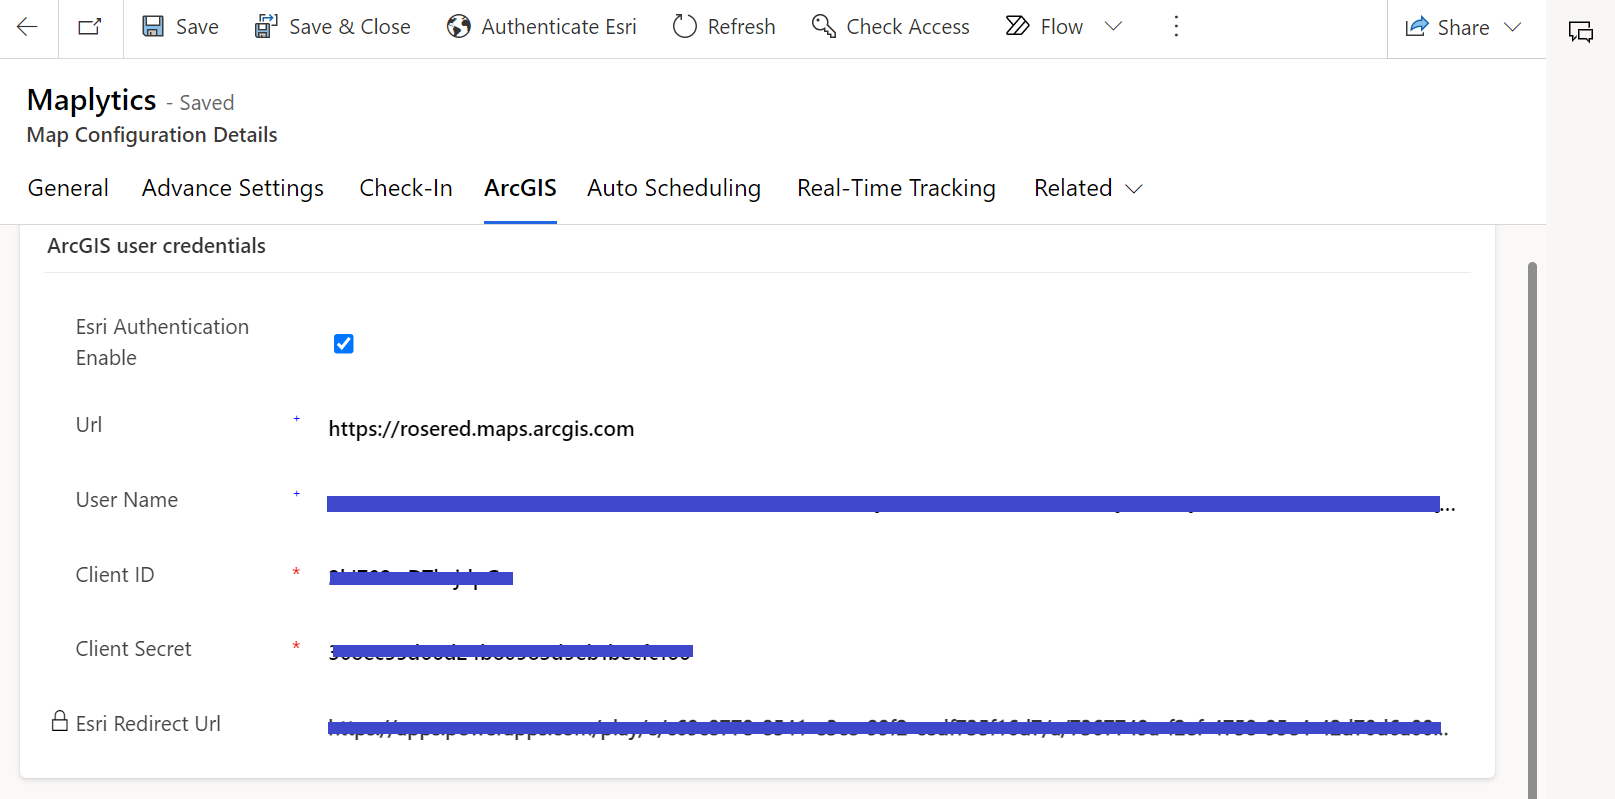
Go to Settings > Maplytics Configuration Details > Default configuration record > ArcGIS
In case the multi-factor authentication option has not been enabled, the user can enter the URL from the ESRI Website, user name, and password.
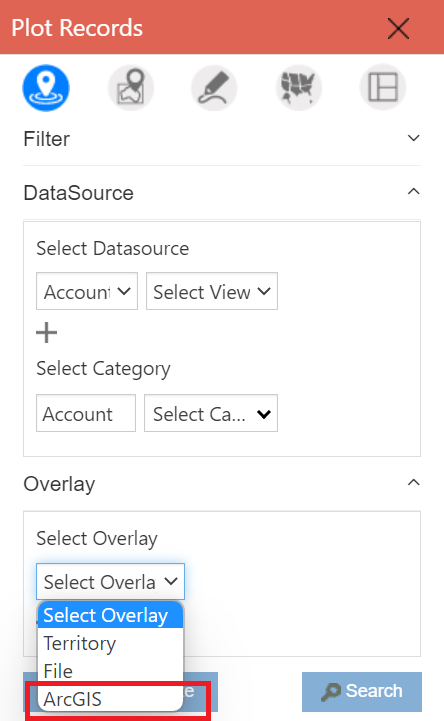
Once saved, the user can avail of the option of ArcGIS in the Overlay dropdown.
Multi-factor authentication
The user needs to have a Developer’s Account on the ArcGIS website by ESRI to use along with Dynamics 365 CRM maps. Once an account is created, the user will have their username and password. Having access to this account, the user can select the feature layer that is suitable for their overlay needs.
Go to Settings > Maplytics Configuration Details > Default configuration record > ArcGIS
The user needs to provide a Client ID and a Secret Code that is available for the developer account. On saving the entered configuration record, a redirection URL gets generated. Further steps can be explored here.
The User can then avail access to an option of ArcGIS in the Overlay dropdown.
Maplytics is like water that can be molded into any role. It makes Bing Maps and Azure Maps integration within Dynamics 365 look seamless. Radius Search, Route Mapping, and more have become super easy to use.
To get more acquainted and experience it first-hand, one can write to crm@inogic.com.
To investigate the product further, with a personalized demo within Microsoft Dynamics 365 CRM / Dataverse / Power Apps / Canvas App, get in touch with the team.
For applied knowledge, do visit our Website or Microsoft AppSource. One can hop on to the detailed Blogs, Client Testimonials, Success Stories, Industry Applications, and Video Library for a quick query resolution.
You can check out our technical tutorial video series #KnowYourMaplytics here, and for fun Tips & Tricks about Maplytics, have a look at our series #ProAtMaplytics here. Technical docs for the working of Maplytics are also available for reference.
You can also leave us a review or write about your experience on AppSource or the G2 Website.

